
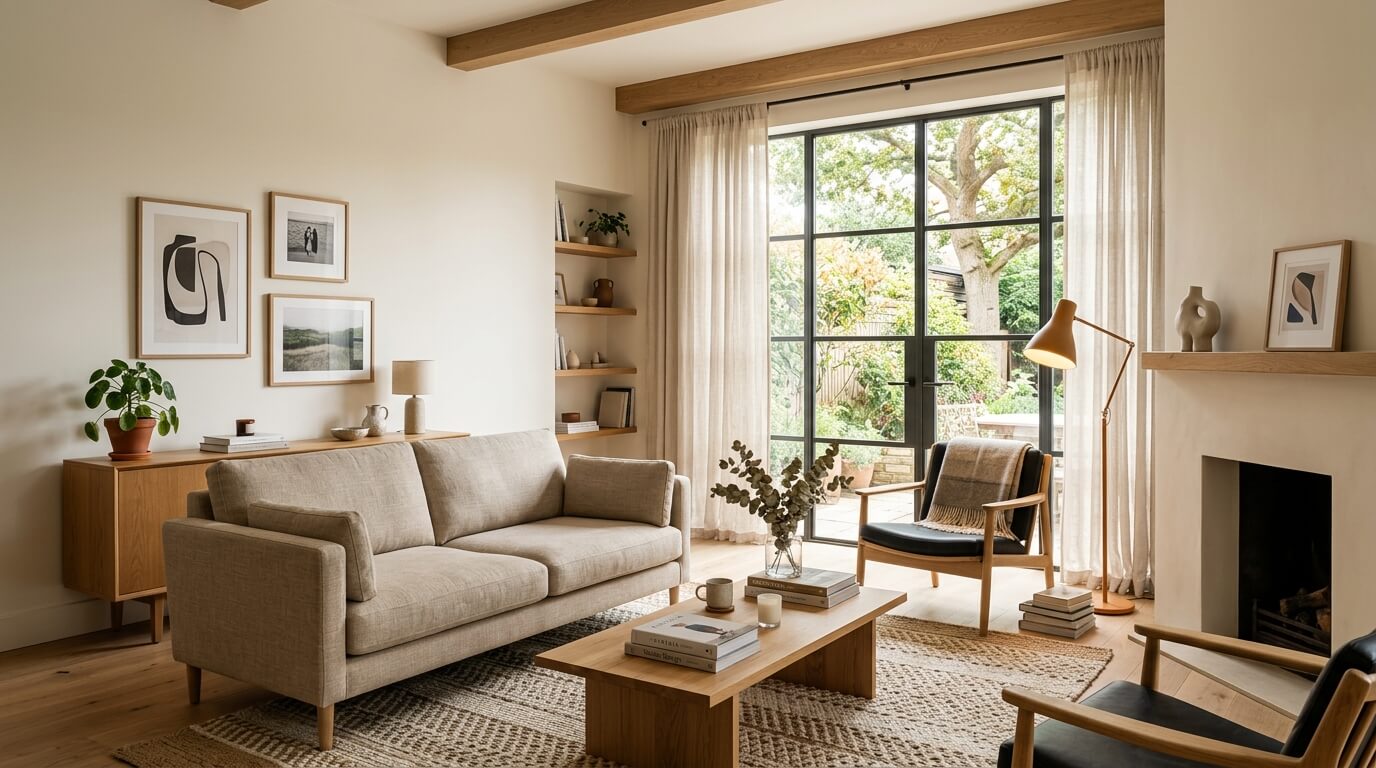
What AI Interior Design Can and Cannot Understand From a Room Photo
Learn what AI interior design can infer from a real room photo, what it cannot verify, and how to use a generated concept responsibly before decorating or renovating.
AI interior design from a room photo is most useful when it answers a visual question: would a warmer palette work here, could the seating feel more balanced, or would a different lighting direction make the room feel calmer? It is much less reliable when the question depends on facts hidden behind the image, exact measurements, building codes, or product specifications.
That distinction matters. A generated room can be a helpful design concept without being a construction plan. Used carefully, AI room design helps you compare possibilities before you buy furniture, paint, tile, lighting, or cabinets. Used carelessly, it can make an attractive idea look more certain than it really is.
This guide explains what a real room photo gives an AI interior design tool to work with, what the result can help you decide, and what still needs to be checked in the real space.
What AI can see in a room photo
A room photo contains more useful information than a blank prompt. Even when the image is imperfect, it can show visible relationships that shape a design direction:
- The position of walls, windows, doors, floors, ceilings, and built-in features
- The approximate scale and placement of sofas, beds, cabinets, tables, and lighting
- The existing color palette, material families, contrast, and natural-light mood
- The main focal point and the areas that feel visually empty, crowded, dark, or disconnected
- How furniture, rugs, curtains, artwork, plants, and accessories relate to one another
This is why AI interior design from a photo is more useful than asking an image model to invent a room from scratch. The photo anchors the concept to a real space. It does not make the result exact, but it gives the model a better starting point.
What AI can help you explore
The strongest use of AI room design is early visual comparison. You can create several directions from the same photo and look for the changes that remain useful across different styles.
Color and material direction
AI can help you compare warm white against cooler white, light oak against darker wood, matte black against brass, or a restrained neutral palette against a more expressive color story. The image will not prove the exact paint or material color in your home, but it can show whether the overall relationship feels balanced.
Furniture mood and visual weight
You can test whether lower furniture, softer upholstery, a larger rug, or fewer visible objects make the room feel calmer. In a living room, this may mean comparing a heavier sectional with a lighter sofa-and-chair arrangement. In a bedroom, it may mean testing the visual effect of matched nightstands, layered bedding, or softer bedside lighting.
Focal points and circulation cues
AI can help you think about what the eye notices first: a fireplace wall, a kitchen island, a bed wall, an entry path, or a garden walkway. It can also suggest where visual clutter is interrupting the room. These are design-direction questions, not measurements, but they are often the decisions people need to make before choosing products.
Lower-risk changes before renovation
Photo-based design is especially useful for changes that are visible and comparatively easy to test: wall color, lighting warmth, curtains, rugs, hardware, counter styling, planting, furniture mood, and decorative layers. You can explore a kitchen refresh without immediately deciding to replace cabinets or change plumbing.
A practical photo-to-design workflow
Use AI to narrow the direction, then verify the decisions in the real room.
Room photo
Show the walls, floor, windows, and how the space is used.
Design brief
Name the mood, style, priorities, and limits.
Visual concept
Compare a few credible directions for the same room.
Design guidance
Turn the strongest image into choices and next steps.
Verify
Measure the room, sample materials, and check what can be built.
The workflow is simple: start with a clear photo, write a focused design brief, compare visual concepts, turn the strongest concept into guidance, and verify the decisions before acting.
What AI cannot verify from one image
A room photo is still a two-dimensional view. It cannot reliably reveal everything required for a real renovation or purchase decision.
AI can help explore
- Visible wall, floor, window, and furniture relationships
- Color palette, material mood, and lighting direction
- Focal points, visual balance, and styling layers
- Several design directions for the same real space
- A clearer brief for shopping or design conversations
Still needs verification
- Exact dimensions, clearances, and structural conditions
- Electrical, plumbing, ventilation, and building-code details
- Real product color, texture, availability, and price
- Installation method, load limits, and long-term durability
- Whether a proposed change is permitted or buildable
Those limits do not make AI room design useless. They define the correct job for the output. Treat the image as a visual brief and a way to compare decisions, then use measurements, product samples, specifications, and qualified professionals for decisions that affect the building.
Three real room examples
The following authorized Roomagic cases show how the same photo-first workflow can support different kinds of design questions.
Living room: make the main wall feel intentional
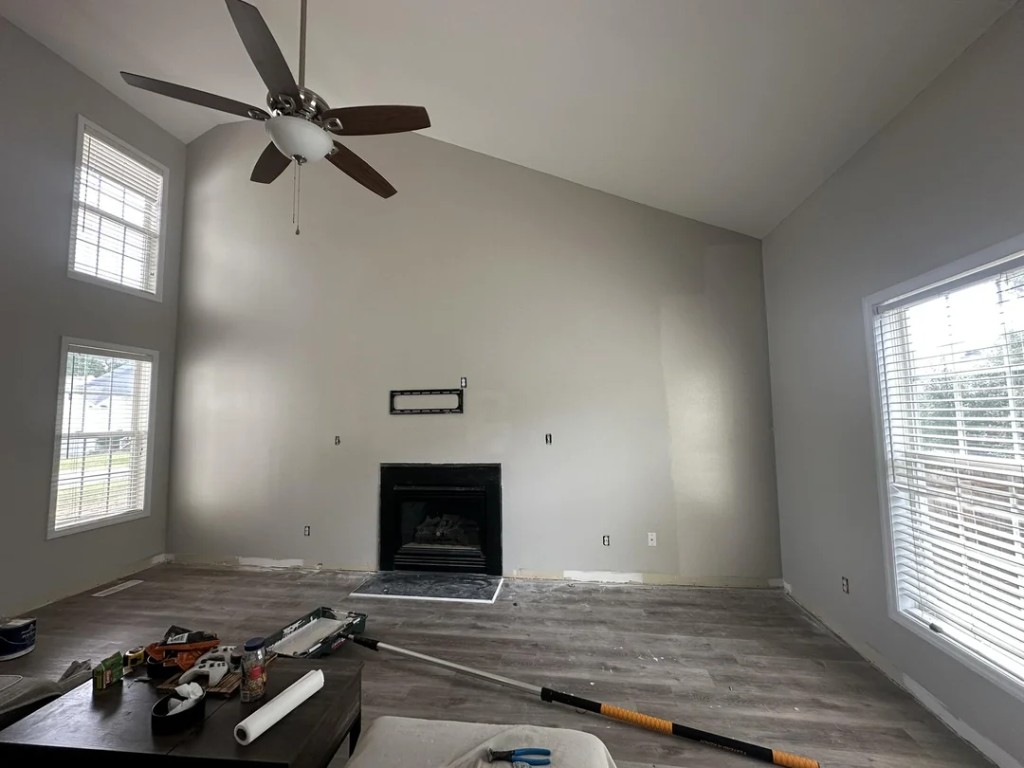
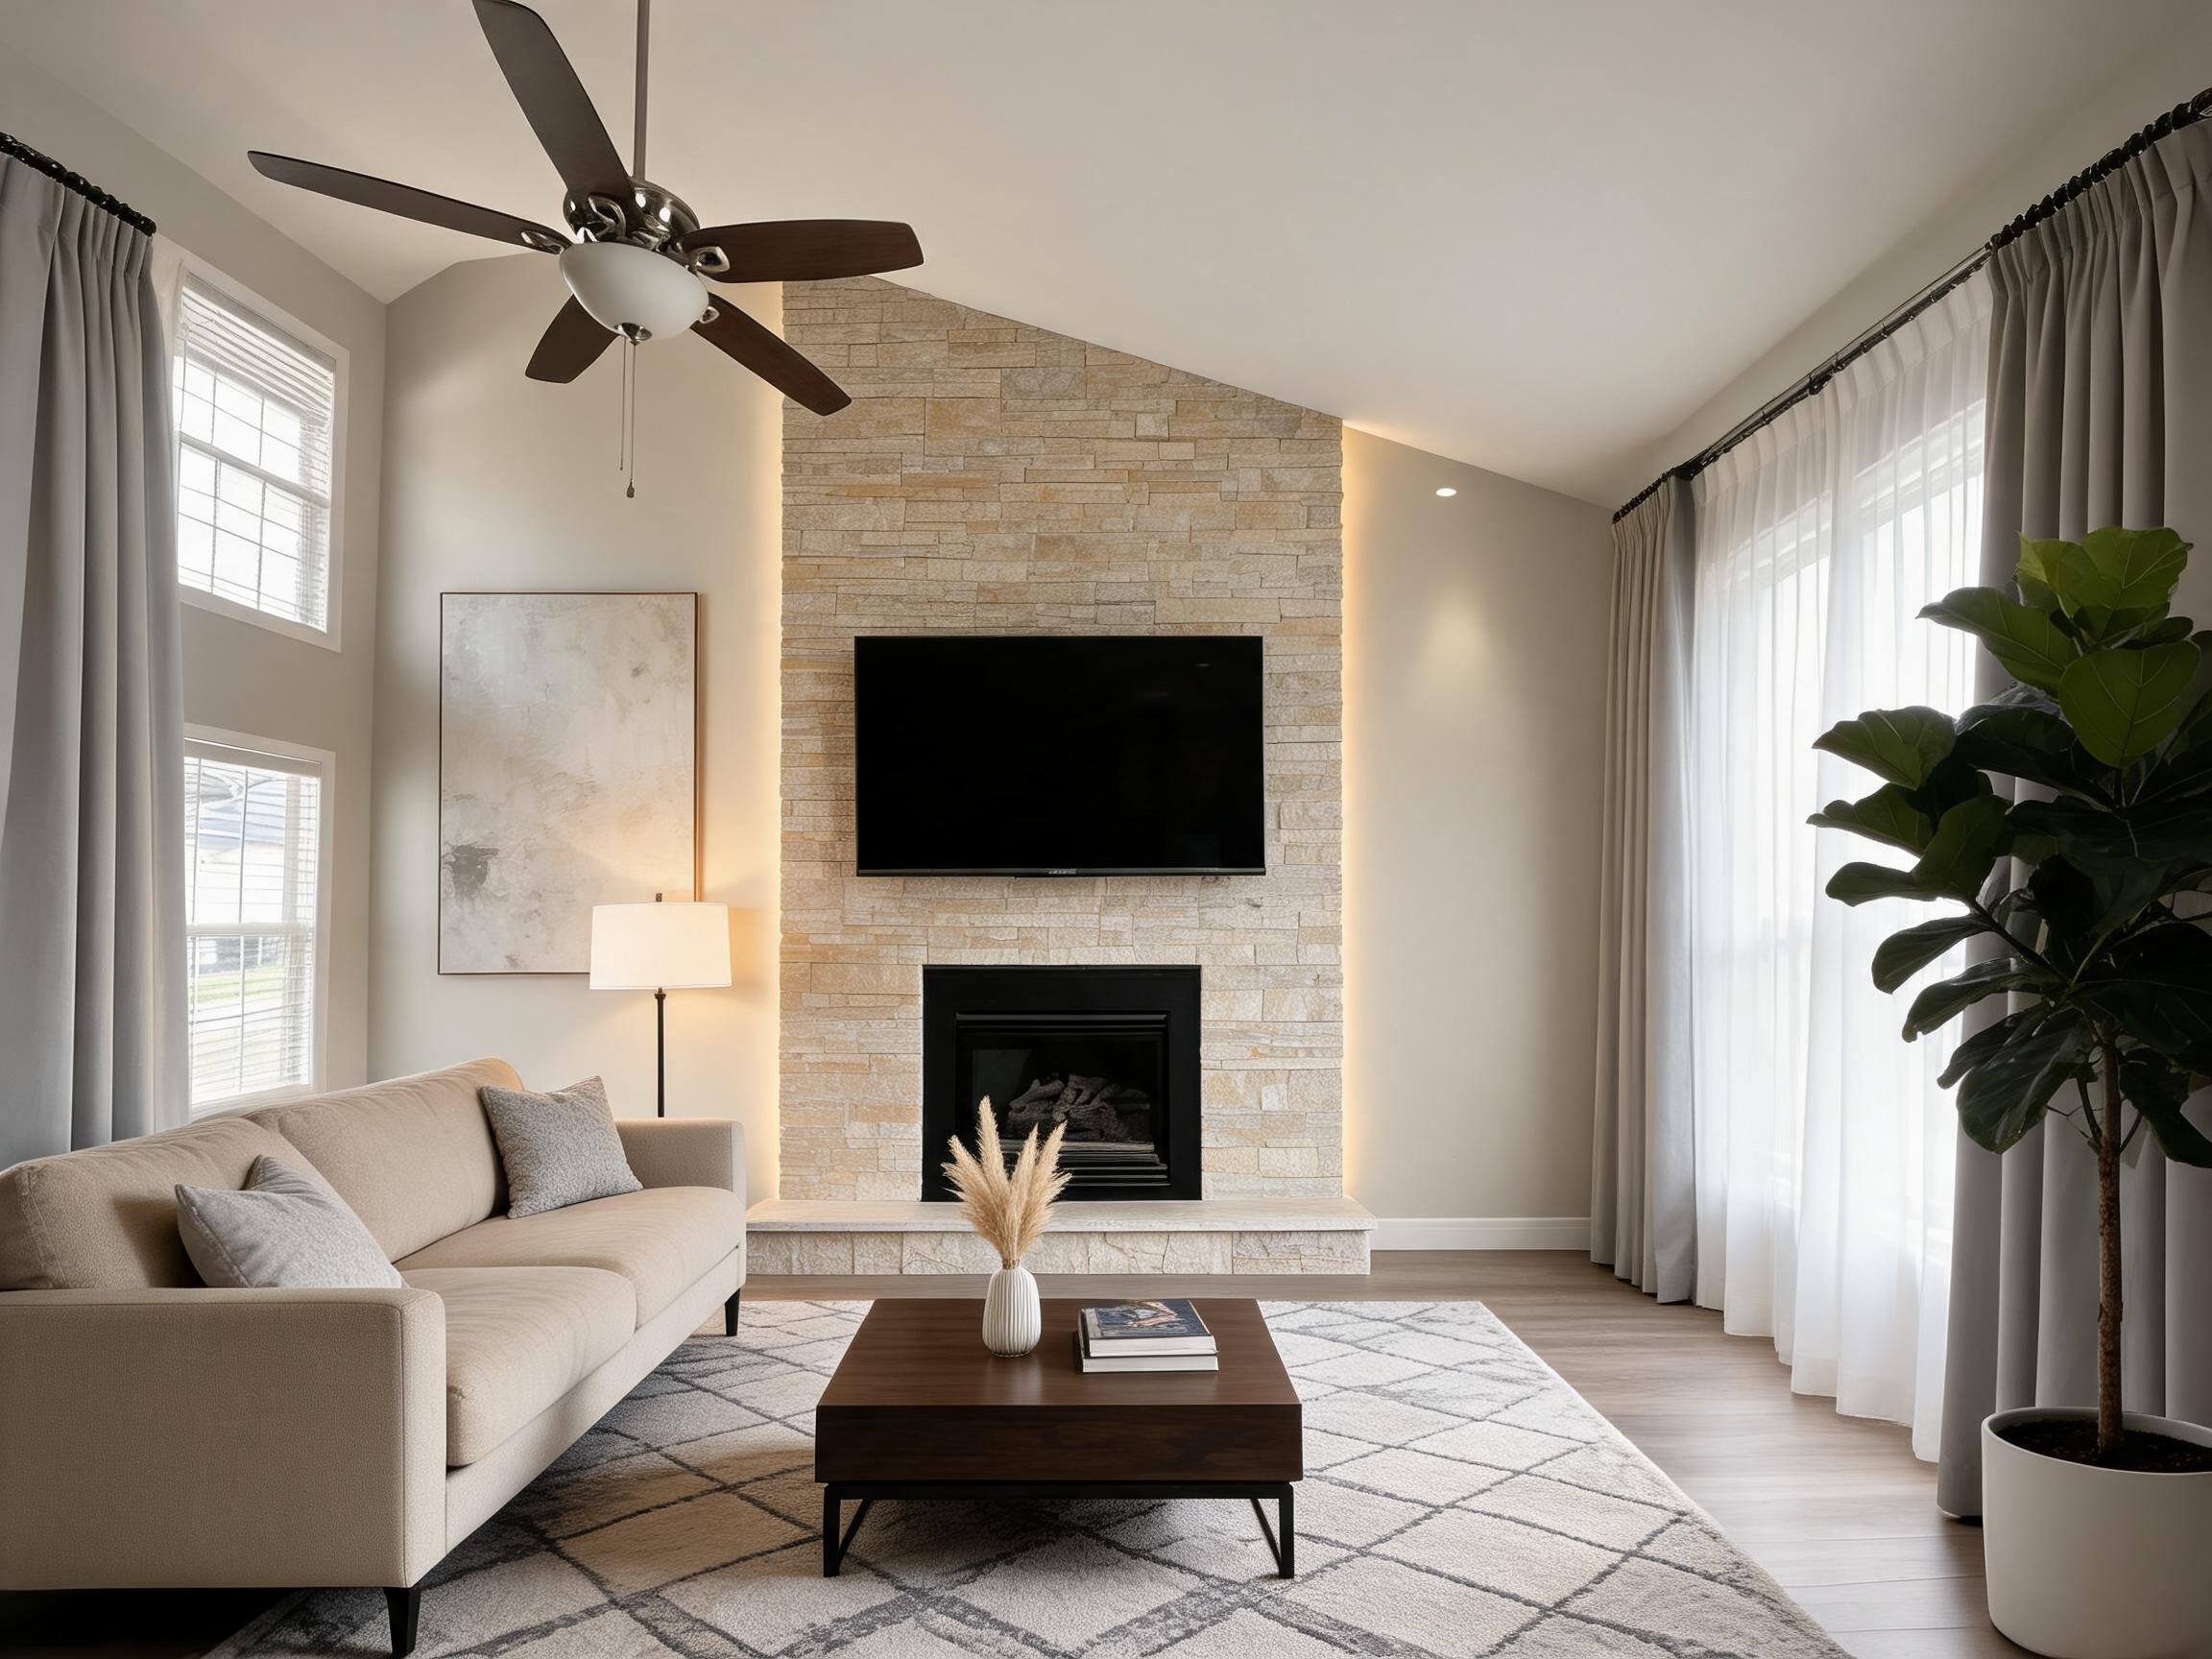
In this living room, the central idea is not simply “make it modern.” The design concept uses a vertical stone surround to make the tall fireplace wall feel intentional, then adds warm cove lighting, a low hearth extension, and a restrained neutral palette. The useful question is whether the focal wall, television, firebox, furniture, and lighting now read as one composition. The generated concept helps you compare that relationship; it does not confirm the fireplace installation or television clearance.
Read the full Modern living room design case for the material direction, budget notes, and sizing guidance.
Kitchen: improve function without assuming a new layout
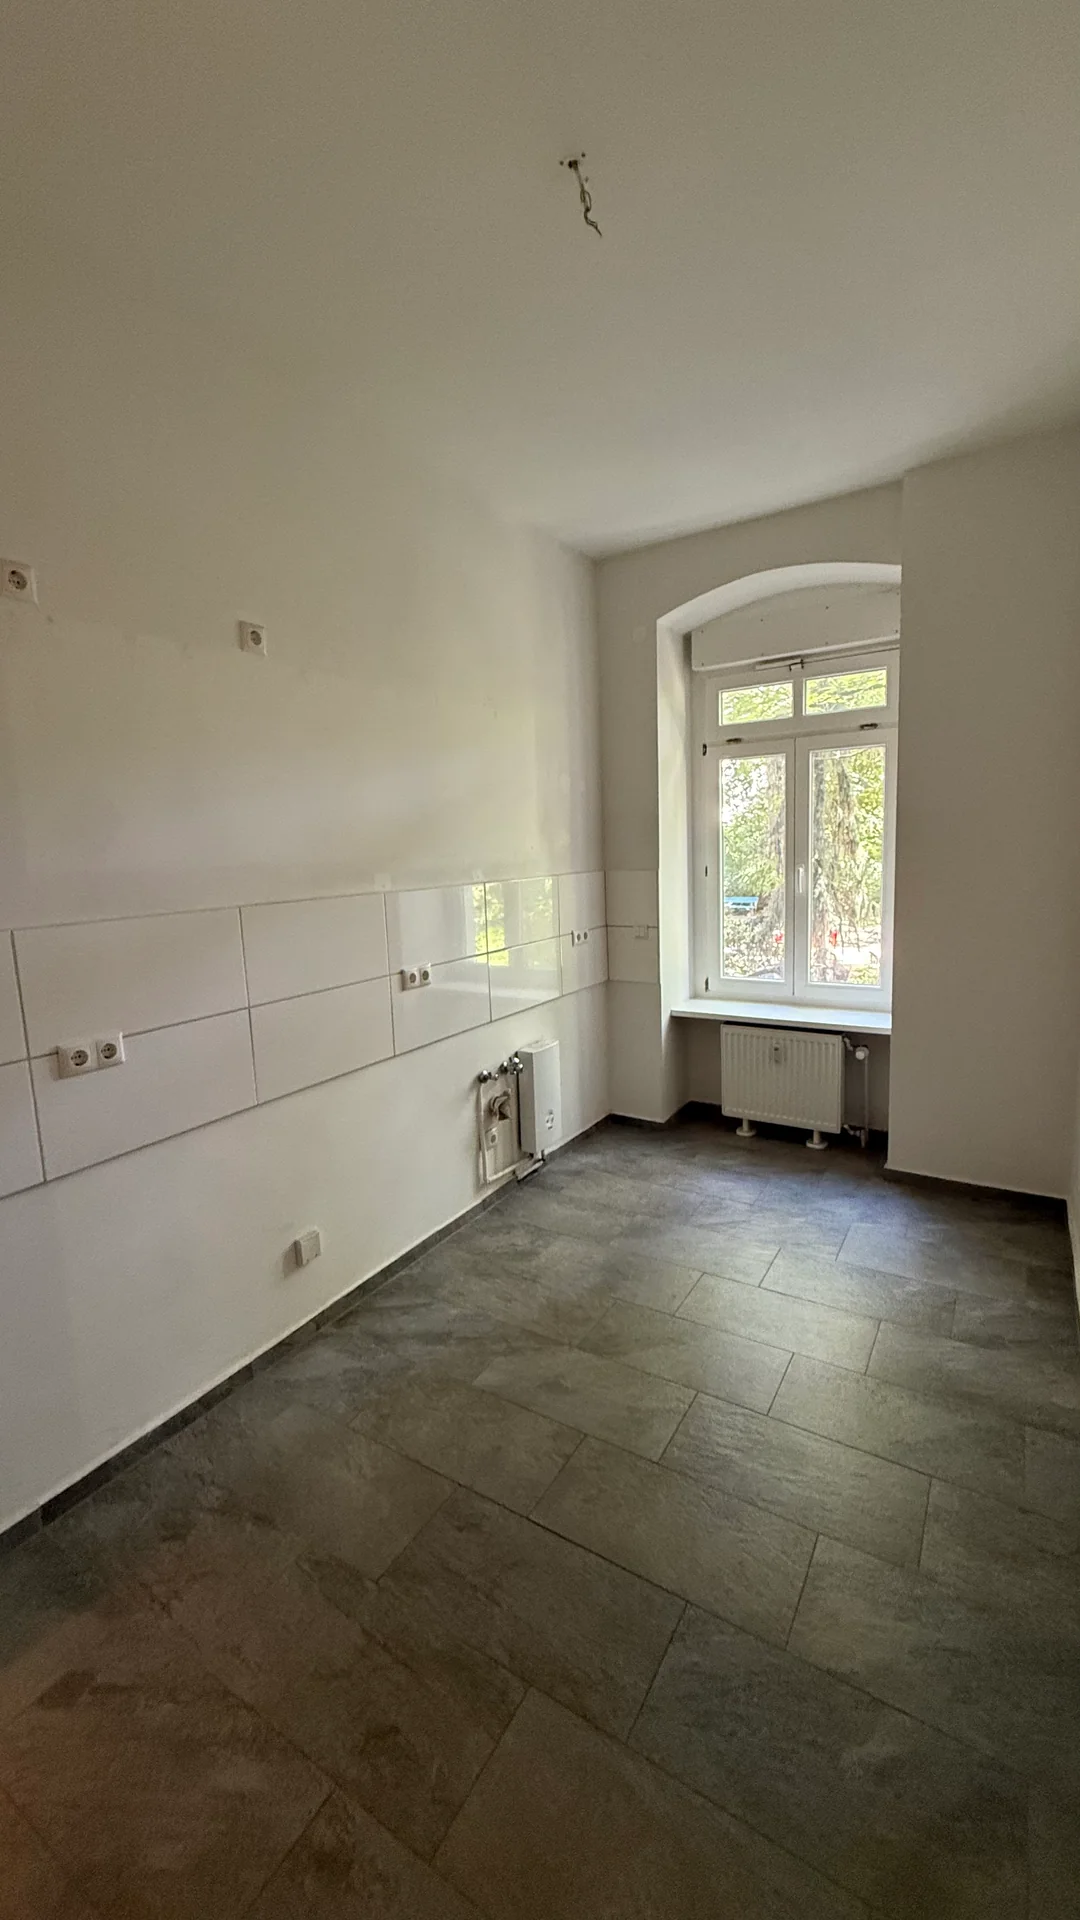
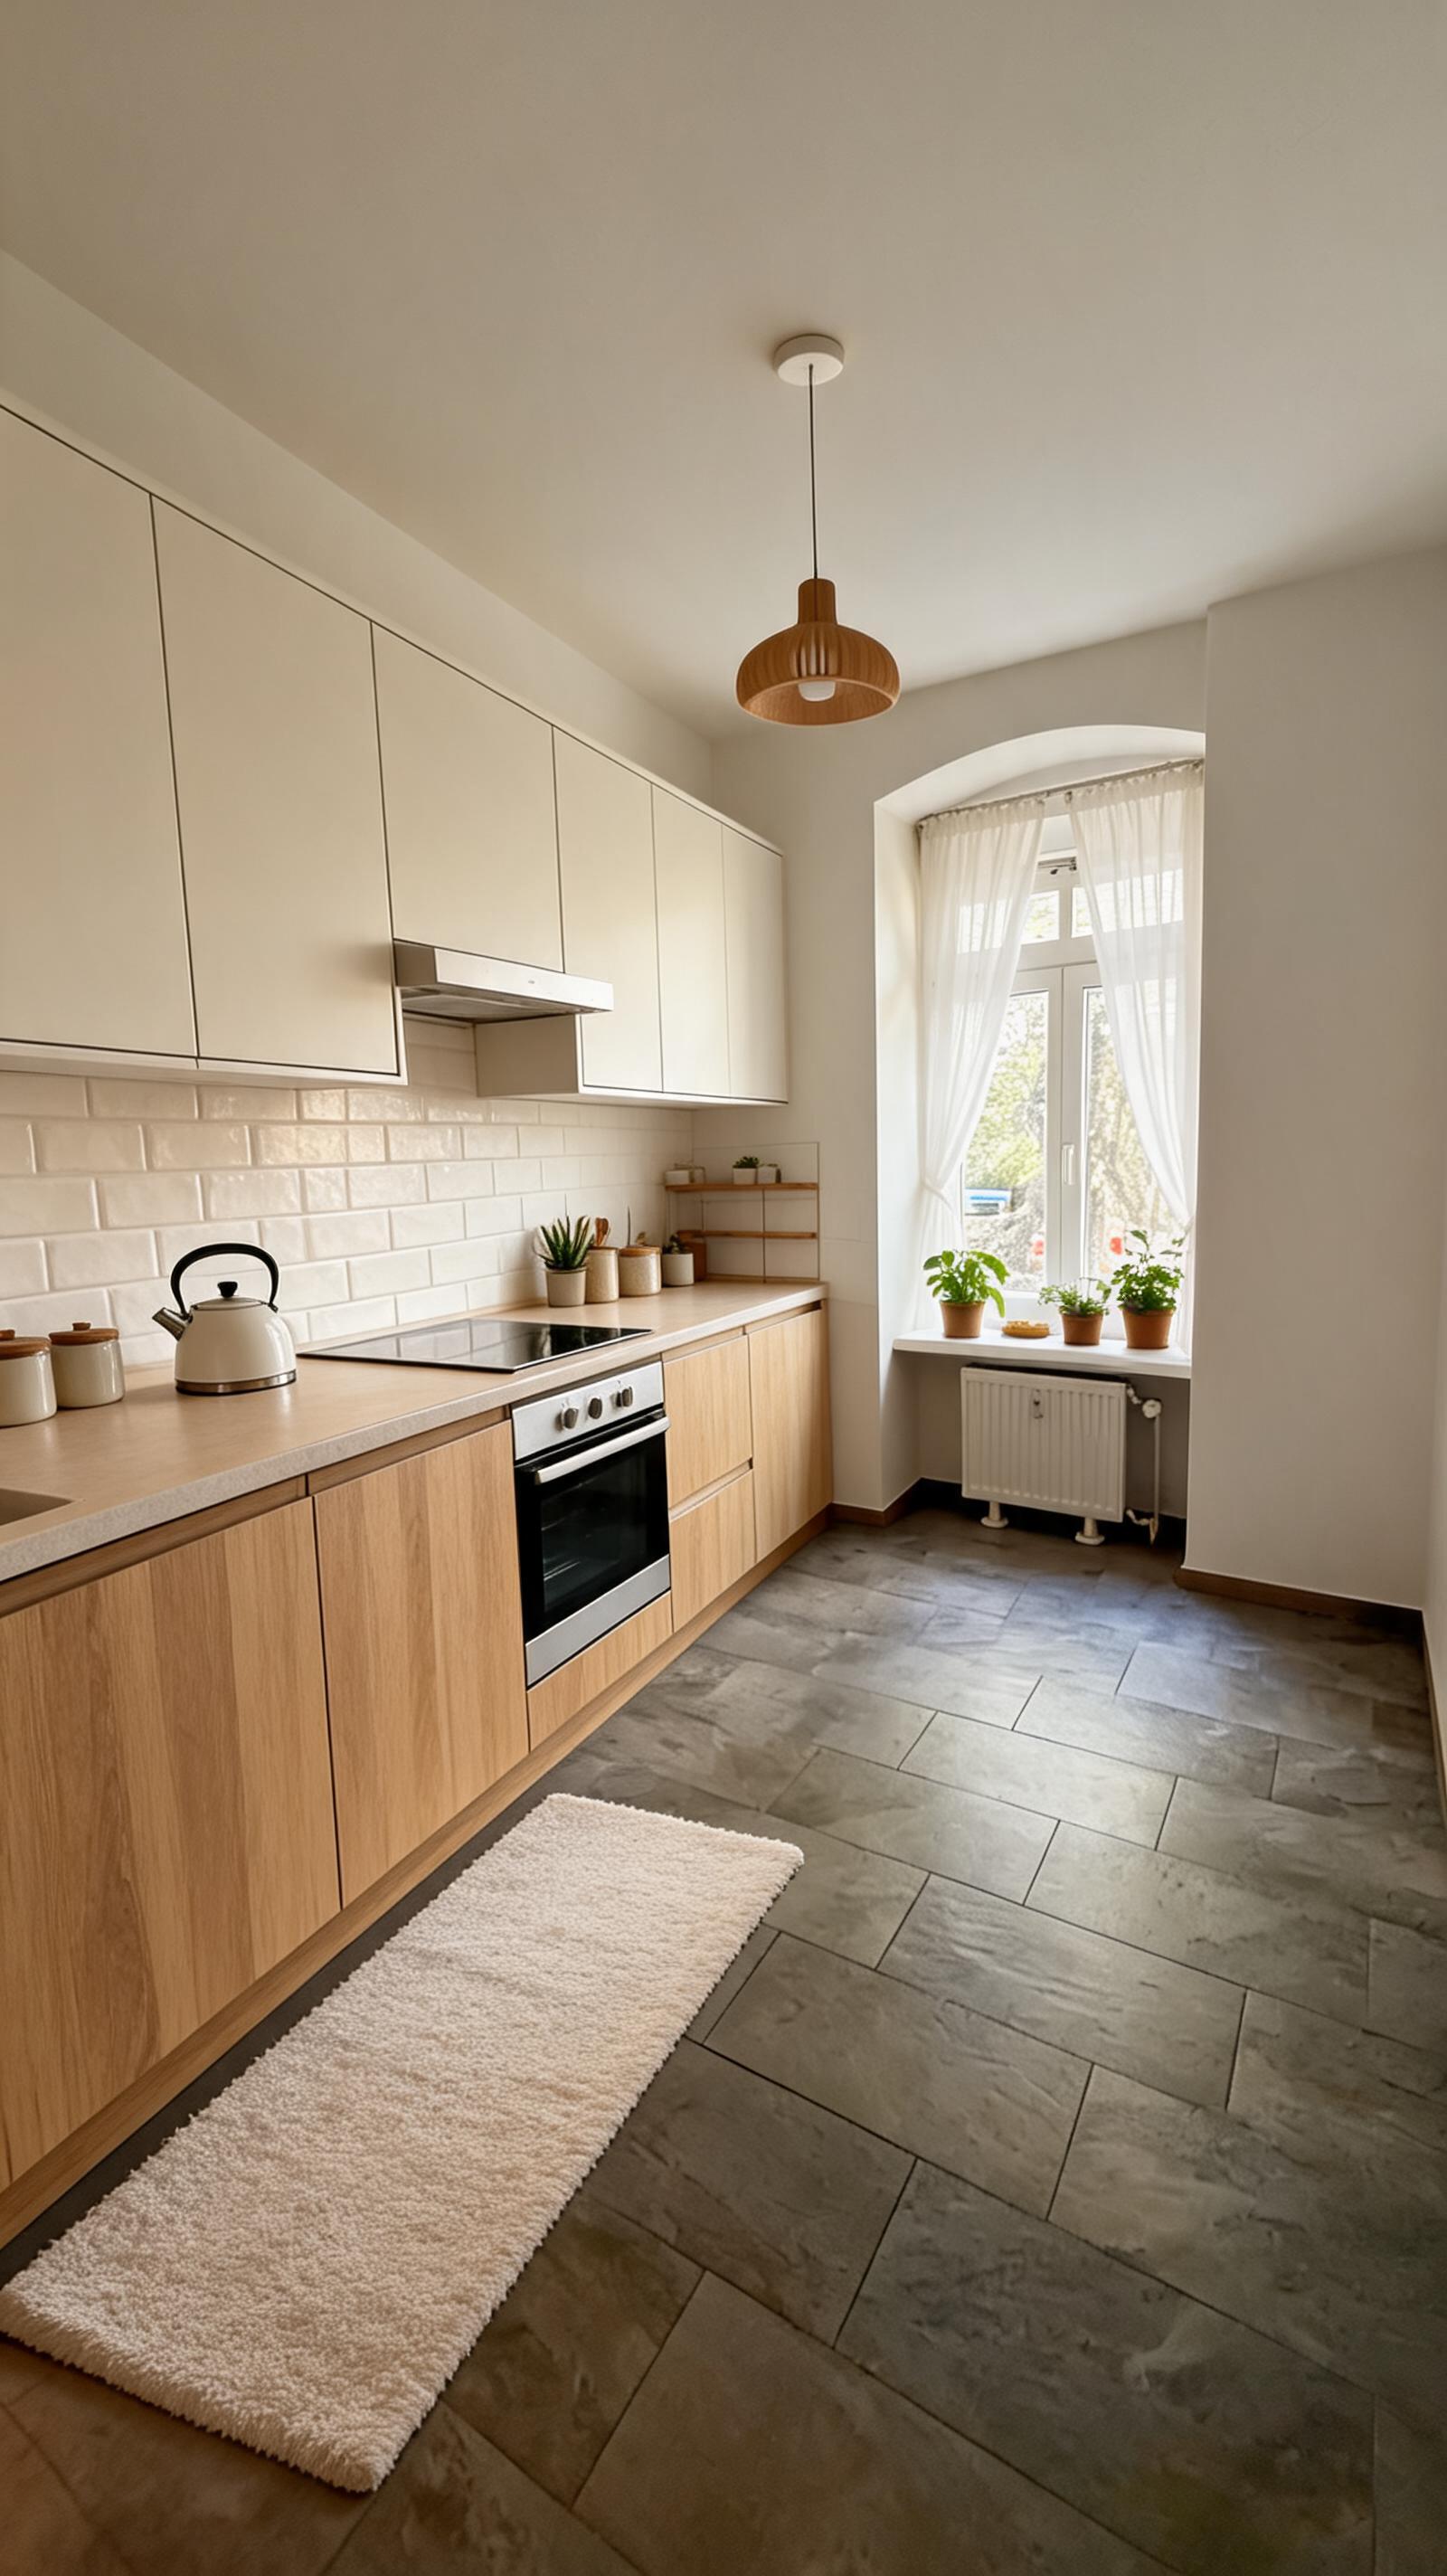
The kitchen example focuses on a narrow single-run layout. The visual direction keeps the circulation and window light open, uses warm oak for the lower cabinets, soft mushroom for the upper plane, and adds creamy handmade-look tile. This is a good example of AI helping with material relationships and visual priorities. It is not proof that a particular cabinet run, extractor, countertop, or duct path will fit. Those details still need measurements and installation review.
For lower-risk kitchen ideas, continue with kitchen refresh ideas without renovation. For a broader before-and-after discussion, see the small kitchen remodel guide.
Front yard: see the relationship between path, planting, and entry
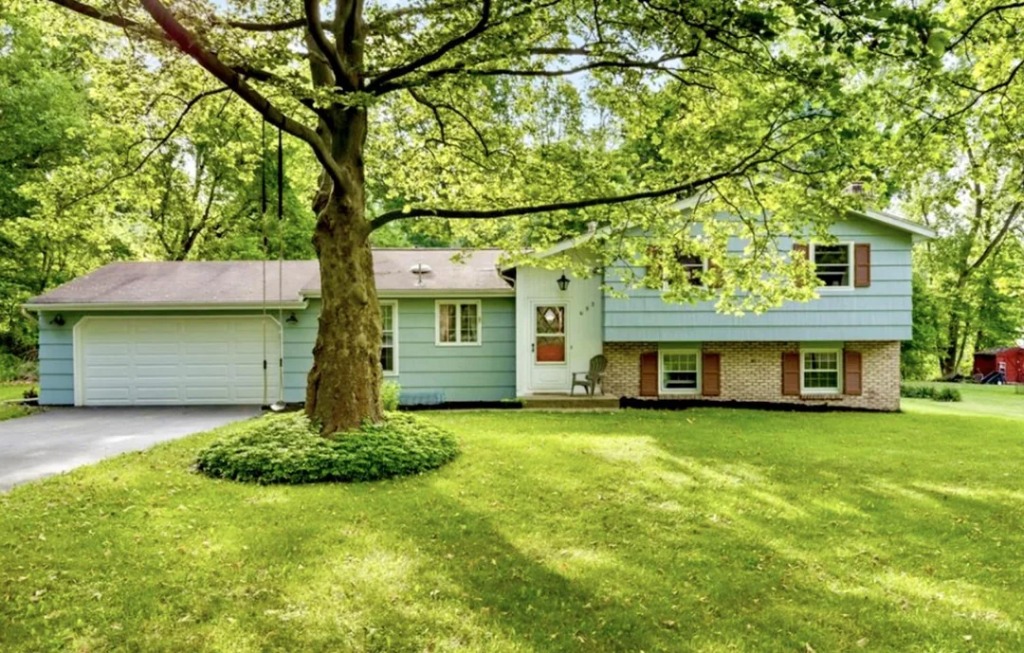
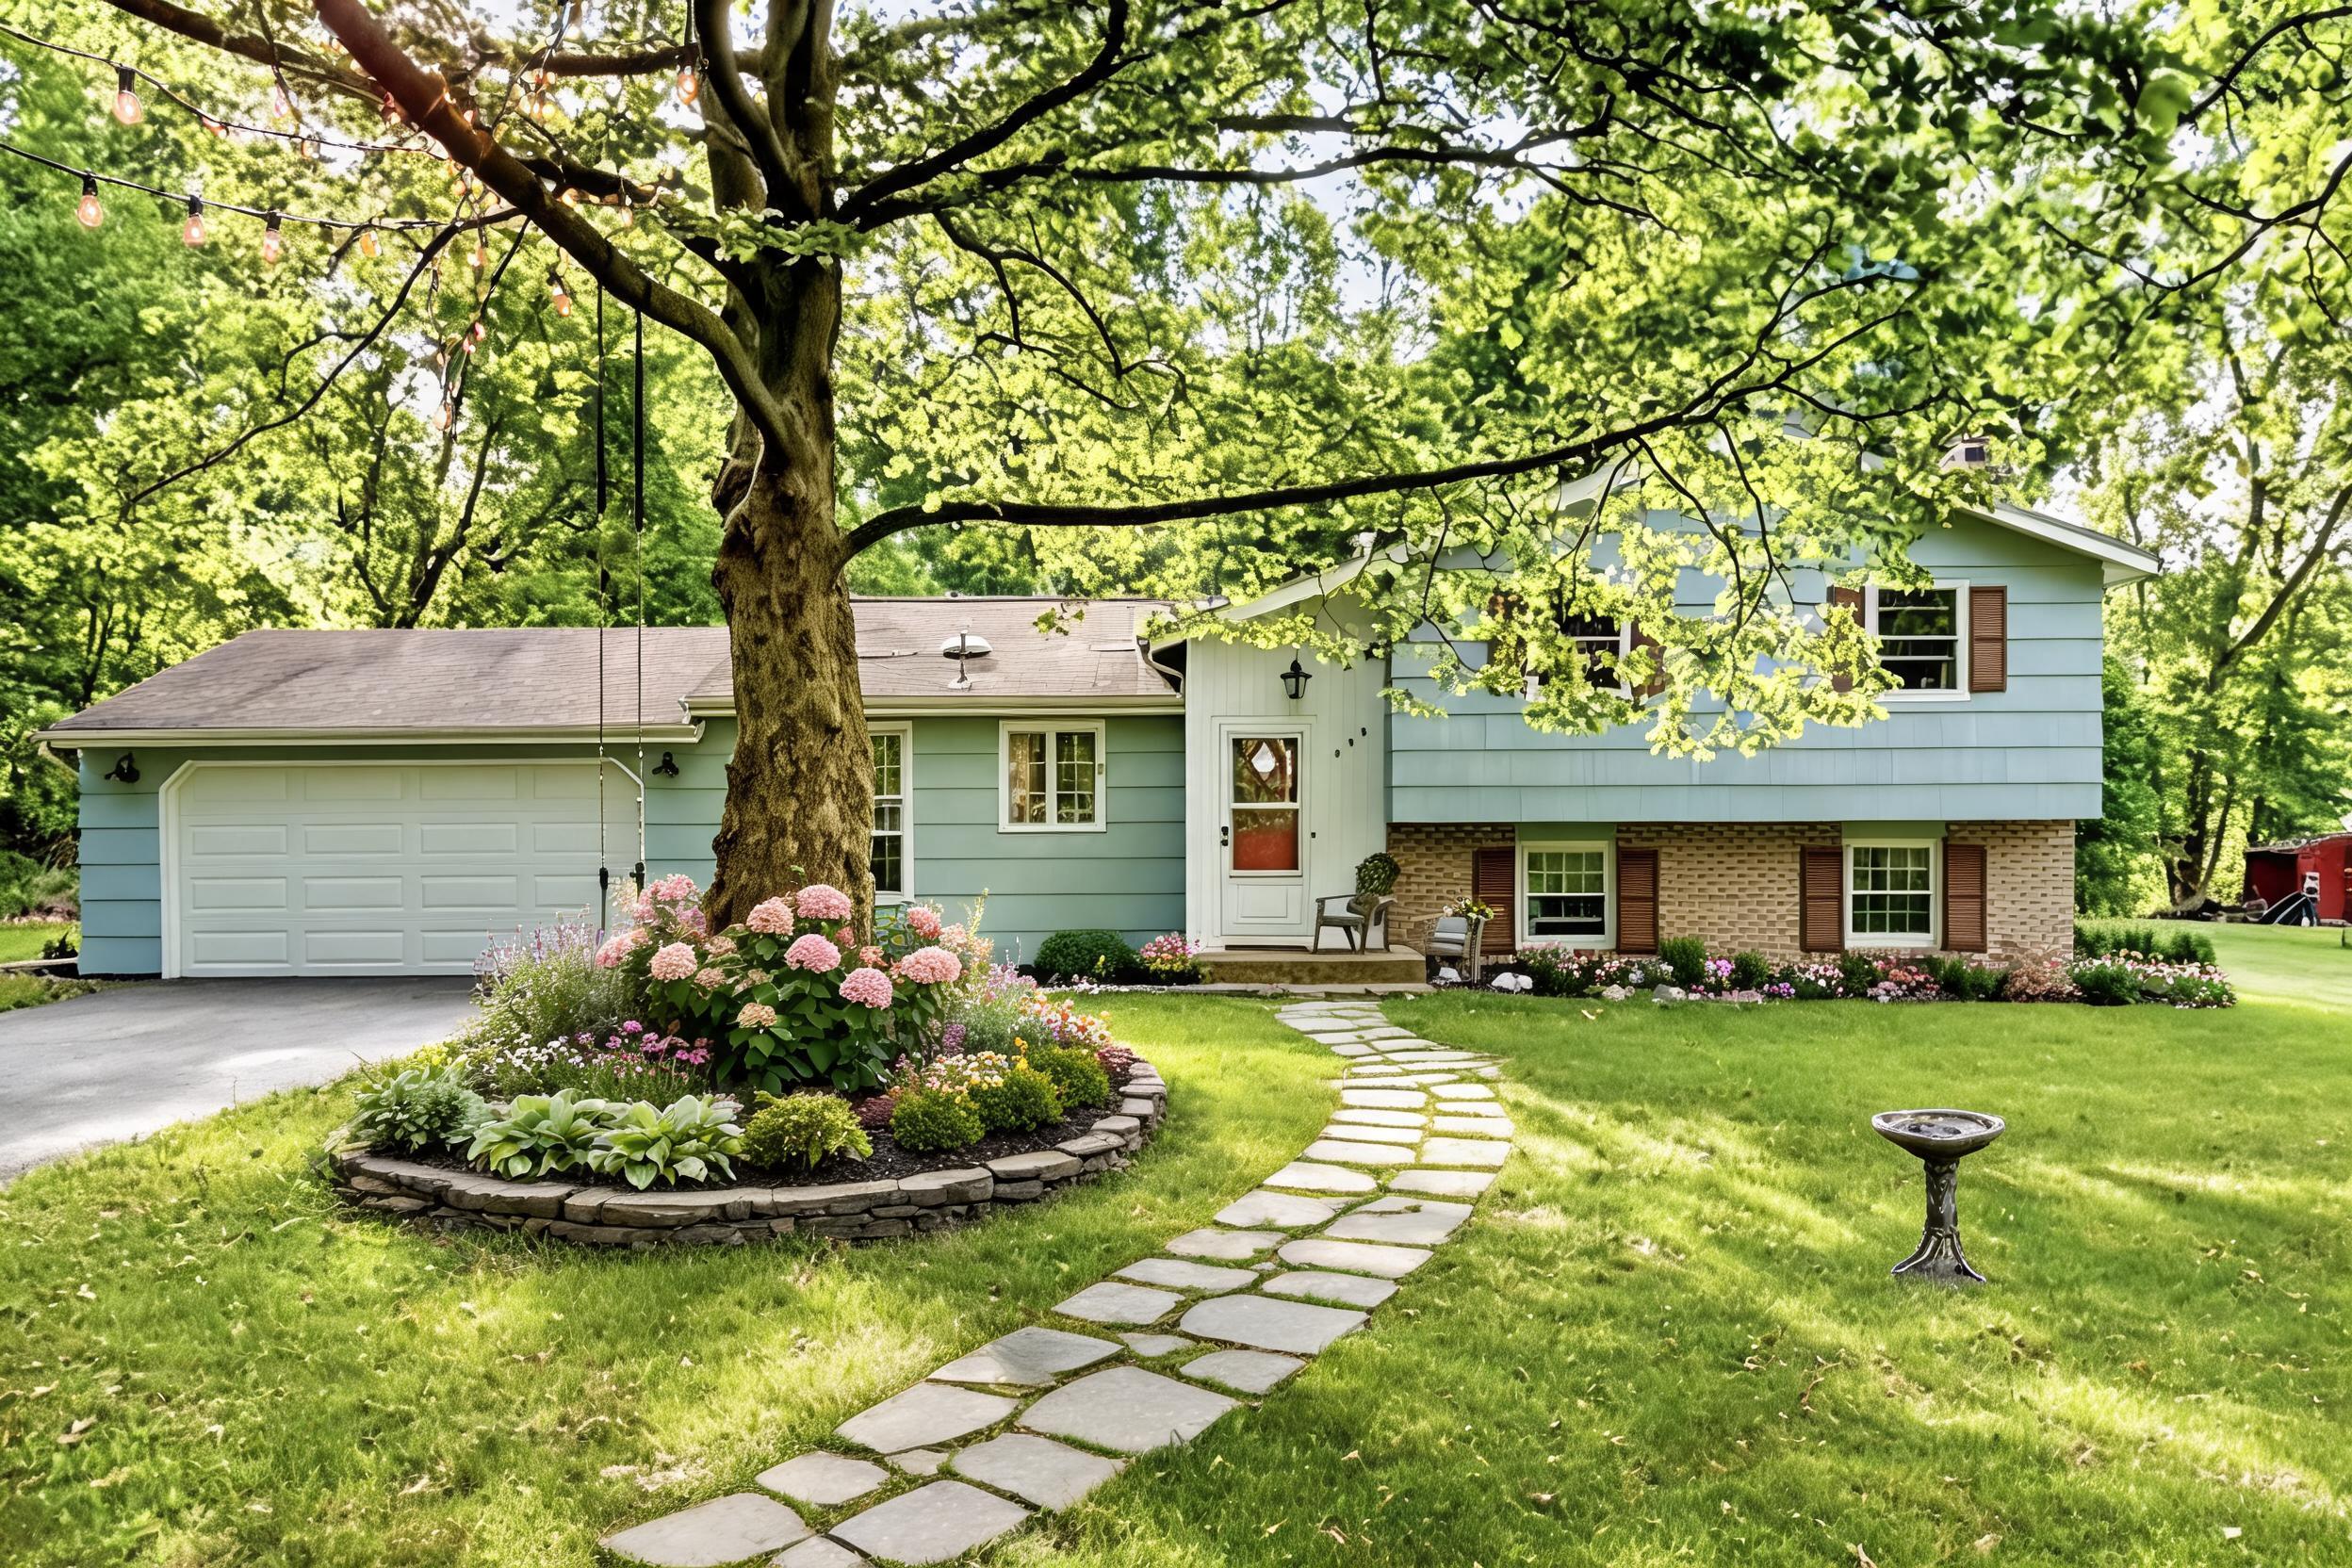
Here, the important design decision is the sequence from driveway to front door. An offset stone walkway, layered planting beds, a warmer front door, and subtle path lighting work together to change the arrival experience. AI can help you see those relationships in one image. It cannot determine drainage, right-of-way restrictions, soil conditions, plant suitability, or the actual cost of installation. For more outdoor examples, visit AI garden design and the front yard landscaping guide.
How to review an AI design before acting on it
Do not judge an AI redesign only by whether it looks attractive. Use a short review that separates visual usefulness from real-world certainty.
| Question | What to look for |
|---|---|
| Is the room still recognizable? | Windows, doors, walls, floor direction, fixed features, and camera perspective should remain believable. |
| Is the main decision clearer? | You should be able to name the palette, focal point, furniture direction, lighting idea, or planting structure being tested. |
| Can the change be described simply? | A useful concept should become a short brief for a retailer, designer, contractor, or partner. |
| What still needs proof? | Mark dimensions, product specifications, code-sensitive work, installation, and budget assumptions for later verification. |
If a result changes a fixed feature you wanted to keep, add a clearer instruction and regenerate. For example: “Keep all windows, doors, flooring, and the existing kitchen layout unchanged. Explore only warmer materials, lighting, and decor.” If the image still changes the structure, treat that result as inspiration rather than a usable concept.
A practical photo-to-design workflow
The most dependable process is iterative but simple:
- Take a level photo that shows the room's structure, natural light, and main furniture.
- Write a short design brief that names the desired feeling, style, and two or three constraints.
- Generate several directions from the same photo instead of judging one isolated result.
- Look for repeated signals across the images: a palette, material family, lighting approach, or furniture scale that keeps making sense.
- Turn the strongest direction into a short design brief and verification list.
- Measure the real space, sample real materials, check current prices, and involve a qualified professional when the work affects structure, systems, safety, or permits.
Roomagic follows this photo-first workflow: upload a real photo, choose a space and style, add an optional Additional Prompt, and review the generated result with written design guidance. The same-room AI design comparison explains how to compare tools using the same image and constraints rather than relying on a single attractive output.
AI interior design is a starting point, not a construction plan
The best AI interior design result is not necessarily the most dramatic one. It is the one that helps you make a clearer decision about your real space while keeping the boundary between visual exploration and technical verification visible.
Use a room photo to test a direction. Use the design report to explain the choices. Use measurements, samples, specifications, and professional review to decide what can actually be built. That combination turns AI room design from a novelty into a more responsible early planning tool.
For more practical guidance, read how to redesign a room using AI, compare the best AI interior design tools by use case, or start with AI interior design from your own room photo.